Materials and Tools Checklist
You don’t need a contractor’s toolbox for this project, but you do need solid basics. First, choose your boards plywood or solid wood is fine, but stick with ¾” thickness for durability and support. Avoid anything flimsier unless you want sagging issues later.
Grab wood screws, a strong wood glue, and some metal brackets these will hold the entire frame together without fuss. You’ll also need a power drill, a circular saw (a handsaw works if you’re patient), and a trusty tape measure. Accuracy counts, so don’t eyeball the cuts.
For finishing, sandpaper is your best friend take the time to smooth out edges and corners. Then go with paint or stain, depending on your aesthetic. If you want a clean, modern look, paint works. For a natural vibe, stain brings out the wood grain.
Lastly, storage bins or baskets are optional, but they do help keep clutter in check. Choose ones that fit snugly in your compartments you’re building this bench for function as much as form.
Sizing and Planning the Bench

Before you cut anything, get your tape measure. Measure your entryway width, depth, and available height. Don’t guess. That odd corner near the door or baseboard trim can throw things off if you’re not exact.
Next, decide how tall you want your bench. Standard seating height is around 18 to 20 inches. Go too low and it feels awkward. Too high and it’s uncomfortable to tie your shoes. Keep it functional.
Now think storage. Do you want open cubbies you can slide baskets into? Drawers to hide the mess? Or lift up lids with hidden compartments? Each option affects how you build the structure underneath, so lock that down early.
Once those decisions are made, sketch a plan. Doesn’t have to be pretty just clear. If you’re comfortable with digital tools, a basic CAD program helps nail down dimensions and test fitting. If not, pencil and grid paper work just fine.
For more design insight, check out these entryway makeover tips.
Sand, Paint, and Finish
Now that your bench is built, it’s time to make it look (and feel) clean and finished. Start by sanding edges, corners, flat surfaces, all of it. Use a medium grit sandpaper first, then finish with a finer grit to get everything smooth. Don’t rush this part. A sloppy sanding job shows through paint and stain.
Next up: your finish. If you’re painting, go with a durable interior formula that can handle daily wear. Stain brings out the wood grain and works well in rustic or natural style spaces. Use a brush or foam roller for even coverage. Let it dry fully then sand lightly again if you need to, and apply a second coat. You want a surface that looks good and holds up.
A little attention here saves you from future touch ups. Don’t cut corners.
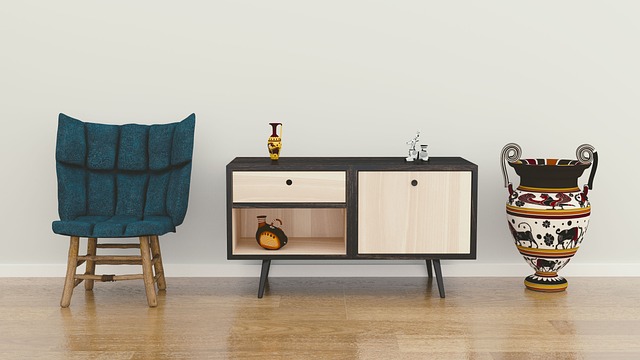
Custom Add ons That Make a Difference
This is where your bench goes from functional to intentional. Start with the basics: a thick, well fitted cushion instantly turns storage into seating that people will actually use. Go for something durable and easy to clean.
If your entryway handles coats, bags, and day to day gear, add hooks or a full back panel to create a hall tree look. It gives the whole setup structure and purpose, especially helpful in tighter spaces.
One more upgrade worth the effort soft close hinges. They help lids close gently, which means no slamming, no pinched fingers, and a bench that feels just a bit more refined.
These small upgrades go a long way see more in our full list of entryway makeover tips.
Maximize Function, Minimize Clutter
Your entryway bench isn’t just for sitting it’s prime real estate for storage. Use the space underneath to stash everyday items like shoes, backpacks, pet leashes, or cold weather gear. If your bench has open cubbies or interior compartments, it pays to keep things sorted. Baskets or bins help separate items and speed up your morning routine. Label them if you’ve got a household sharing the space it’s a simple move that keeps chaos at bay.
One golden rule: keep the top of the bench clear. If the surface stays clean, the whole entryway feels lighter and calmer. Use the hidden storage for what you need and resist turning the top into a drop zone. A tidy bench signals intention and that sets the tone the second you walk in.
 Rebecca McDanielords is the kind of writer who genuinely cannot publish something without checking it twice. Maybe three times. They came to diy home projects through years of hands-on work rather than theory, which means the things they writes about — DIY Home Projects, Gardening and Landscaping Ideas, Home Design Trends, among other areas — are things they has actually tested, questioned, and revised opinions on more than once.
That shows in the work. Rebecca's pieces tend to go a level deeper than most. Not in a way that becomes unreadable, but in a way that makes you realize you'd been missing something important. They has a habit of finding the detail that everybody else glosses over and making it the center of the story — which sounds simple, but takes a rare combination of curiosity and patience to pull off consistently. The writing never feels rushed. It feels like someone who sat with the subject long enough to actually understand it.
Outside of specific topics, what Rebecca cares about most is whether the reader walks away with something useful. Not impressed. Not entertained. Useful. That's a harder bar to clear than it sounds, and they clears it more often than not — which is why readers tend to remember Rebecca's articles long after they've forgotten the headline.
Rebecca McDanielords is the kind of writer who genuinely cannot publish something without checking it twice. Maybe three times. They came to diy home projects through years of hands-on work rather than theory, which means the things they writes about — DIY Home Projects, Gardening and Landscaping Ideas, Home Design Trends, among other areas — are things they has actually tested, questioned, and revised opinions on more than once.
That shows in the work. Rebecca's pieces tend to go a level deeper than most. Not in a way that becomes unreadable, but in a way that makes you realize you'd been missing something important. They has a habit of finding the detail that everybody else glosses over and making it the center of the story — which sounds simple, but takes a rare combination of curiosity and patience to pull off consistently. The writing never feels rushed. It feels like someone who sat with the subject long enough to actually understand it.
Outside of specific topics, what Rebecca cares about most is whether the reader walks away with something useful. Not impressed. Not entertained. Useful. That's a harder bar to clear than it sounds, and they clears it more often than not — which is why readers tend to remember Rebecca's articles long after they've forgotten the headline.