AI Is Speeding Up Workflow Without Replacing Humans
AI has found its way into nearly every part of the vlogging process. Scripting assistants, auto-captioning tools, and AI-based video editors now help creators produce more, faster. These tools reduce hours of work into minutes. Rough cuts get done quicker. Captions and keyword tags nearly write themselves. But here’s the truth: the personality and voice behind the lens still matter more than code.
The best vloggers aren’t replacing their creative instincts. They’re using AI to clear the mess off their plate so they can focus on the stuff that counts—tone, emotion, timing. They automate background tasks like transcribing interviews or generating B-roll ideas, but final cuts and voiceovers still get the personal touch. The machines help, but they don’t replace the creator.
There’s a flipside too. Rely too much on automation, and the content starts to feel flat. Vloggers who can balance speed with soul—those are the ones staying ahead.
Accent Walls: A Bold Move Done Right
Accent walls are one of the simplest ways to transform a room without a full makeover. Whether you’re working in a small space or want to add dimension to an open-concept area, the right accent wall can give your home character, contrast, and depth.
Popular Material Options
Not every accent wall needs to be painted. Here are a few popular and impactful methods:
-
Paint
-
Classic and cost-effective
-
Great for bold color blocks or geometric shapes
-
Peel-and-Stick Wallpaper
-
Ideal for renters or commitment-shy decorators
-
Available in a wide variety of prints and textures
-
Easy to apply and remove
-
Wood Slats
-
Brings warmth and dimension to a space
-
Vertical or horizontal installation can visually expand or elongate a room
-
Great for modern, Scandinavian, or rustic themes
Where to Place an Accent Wall
Choosing the right location is key to getting the most visual impact:
-
Living Room
-
Behind the sofa or TV unit
-
Bedroom
-
Behind the bed as a dramatic headboard extension
-
Home Office or Entryway
-
Adds intention and definition to smaller or transitional spaces
Pro Tips for Execution
Creating a clean and impressive accent wall takes more than just picking a color. Keep these tips in mind:
-
Clean Lines Matter
-
Use painter’s tape for crisp edges
-
Take your time with prep and measuring
-
Play with Patterns
-
Stripes, arches, or geometric motifs add style without clutter
-
Keep the rest of the space neutral for balance
-
Texture is Your Friend
-
Use textured wallpaper, paneling, or layering techniques to add visual interest
A well-placed and well-executed accent wall can turn a plain room into a memorable space. It’s all about choosing the right material, location, and finish.
Introduction
Vlogging hasn’t just survived the past few years—it’s adapted, recalibrated, and in many ways, thrived. Platforms changed, attention spans shrank, algorithms got smarter, but creators kept showing up and reinventing how stories are told on camera.
Now, 2024 is shaping up to be a pivotal year. What used to work—posting long weekly videos with big titles—doesn’t always cut it anymore. The game is tighter. Audiences want fast content but still expect substance. Algorithms value real engagement over cheap tricks. And tools like AI are speeding things up behind the scenes.
For creators, this means recalibrating. Figuring out what still matters and what can be dropped. Clarity, speed, and niche connection are everything now. Whether you’re just starting out or deep into your vlogging journey, staying sharp to these changes isn’t optional—it’s essential.
Lighting That Does More Than Illuminate
Lighting isn’t just about visibility—it sets the tone, defines a space, and even impacts how the space feels and functions. In 2024, thoughtful lighting is a design essential, not an afterthought.
Choose Your Fixtures Wisely
Lighting trends are leaning into versatility and bold character. The right fixture can double as a design statement:
- Statement pendants: Ideal for dining rooms, kitchen islands, or entryways, they offer drama and focus.
- Modern sconces: Great for bedrooms or hallways, adding low-profile elegance and ambient glow.
- Dimmable LEDs: A growing favorite for all room types, offering energy efficiency and mood control.
Each type serves a purpose, both functionally and stylistically. Consider how a room is used before selecting your fixtures.
Know Your Wiring Basics
Not all lighting projects are plug-and-play. Depending on the fixture and its function, some jobs may require behind-the-wall electrical work.
- If you’re replacing an existing fixture with a similar one, basic tool knowledge may be enough.
- For new installations, especially where no power line currently exists, it’s best to consult an electrician.
- Always switch off power at the breaker box before doing any wiring work.
When in doubt, it’s safer to call a pro. Faulty wiring can be dangerous and lead to costly repairs.
Light Shapes Mood and Utility
Lighting directly influences how a room is perceived and used. It’s one of the easiest ways to transform a space without a complete overhaul.
- Warm lighting promotes relaxation—perfect for bedrooms and living areas.
- Cooler lighting increases focus and alertness—ideal for offices or kitchens.
- Accent lighting draws attention to artwork, architectural details, or decor.
With a combination of task lighting, ambient light, and accent fixtures, you can customize the mood and elevate functionality in every room.
Custom shelving is one of those DIY projects that pays off fast. Whether you’re organizing your kitchen, displaying pictures in the living room, or giving your home office a little edge, shelves are the workhorse of functional style.
Start with the right materials. Solid wood is ideal for durability, but MDF or plywood can work if you’re painting. Add sturdy brackets—metal or floating—for support. Sand everything smooth, then choose between stain for a natural look or paint to match your space. Keep it clean and simple.
When installing, measure twice, level once. Use wall anchors if you’re not hitting studs. Keep shelves no more than 3 feet apart for rigid support. Want a pro touch? Hide the hardware or create asymmetrical layouts.
The bottom line: custom shelving takes basic tools and a bit of effort, but the payoff is clean storage and a polished look that fits any room.
Explore more in-depth ideas: How to Build Custom Shelving for Any Room
Got shoes in the hallway, jackets tossed over chairs, and nowhere for your keys? Weekend storage projects can fix all that without eating up your entire Saturday. Think wall-mounted hooks, compact shoe benches, and slim shelving—all doable in a day or two if you plan ahead.
This type of setup doesn’t just clean up the mess. It keeps your routine smooth. Knowing exactly where everything goes reduces brain clutter too. And this matters more in tight spaces or shared homes, where one pile of shoes can feel like a full-blown traffic jam.
Look for raw materials that last: solid wood, powder-coated steel, and heavy-duty brackets. Avoid cheap particle board and plastic unless you’re fine replacing it in six months. Building to last is the smarter play.
Tidy doesn’t mean cold or boring. Use bold wall colors or mix up finishes if you want personality in the practical. It’s your space. Make it work—and look like you planned it that way.
Placement Tips: Where and How to Mount Safely
Mounting shelves or decor in the kitchen, bathroom, or bedroom can add function and style—but placement matters.
Common Placement Areas
In the Kitchen:
- Install floating shelves above countertops or along unused walls
- Use them for storing spices, mugs, or decorative jars
In the Bathroom:
- Mount above the toilet or beside the vanity
- Ideal for storing towels, small plants, or toiletry organizers
In the Bedroom:
- Consider above the headboard for decorative pieces
- Use corner shelves for saving space without visual clutter
How to Avoid a Cluttered Look
Wall-mounted pieces should enhance the room, not overwhelm it. Keep these tips in mind:
- Leave enough vertical space between shelves or artwork
- Keep visual balance—distribute elements evenly across the wall
- Avoid mounting too high unless it’s intentional (e.g., for art or lighting)
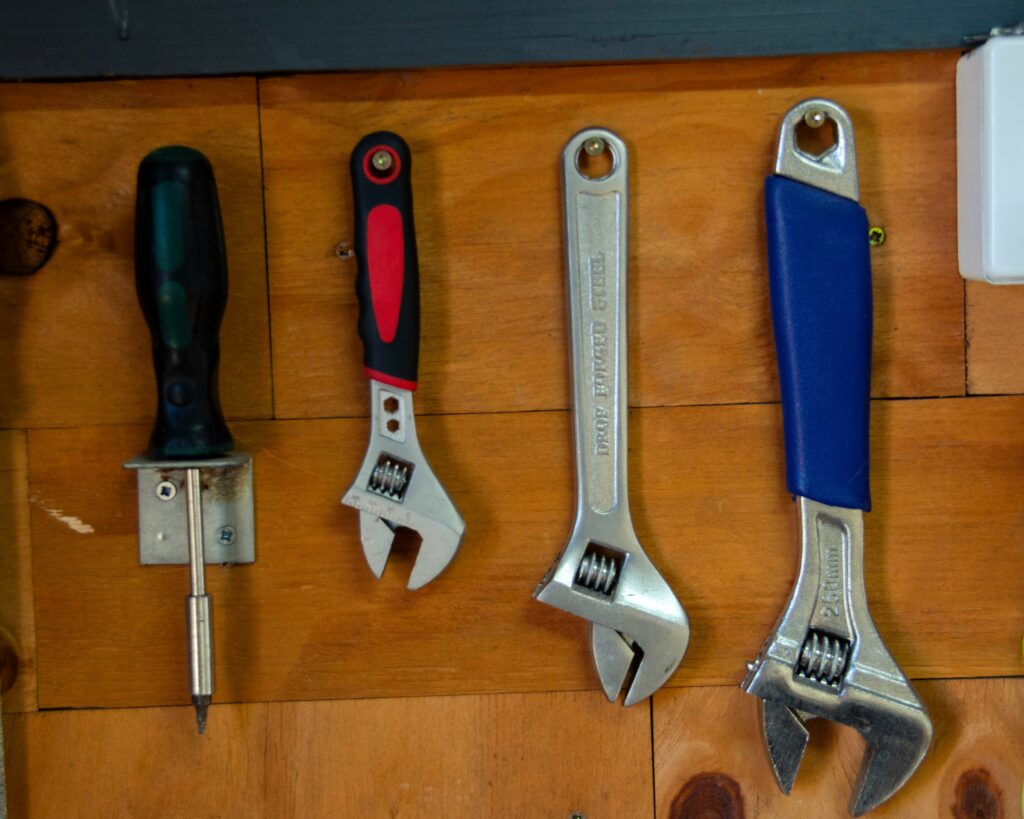
Tools and Safety Essentials
Mounting is only successful when it’s both stable and secure. Before you drill, make sure you have the right tools and follow basic safety steps.
Basic Tools You’ll Need:
- Stud finder (for secure anchor points)
- Level (for straight placement)
- Drill and appropriate drill bits (wood, drywall, or tile)
- Wall anchors or screws based on your wall type
Safety Reminders:
- Always turn off electricity if drilling near electrical lines
- Use proper wall anchors for weight-bearing items
- Double-check stability after installation by applying light pressure
Successfully mounting shelves or decor is all about thoughtful placement, the right gear, and attention to safety. Done right, it enhances both aesthetics and functionality in any room.
You don’t need to completely repaint a room to give it new life. Focus on selective updates: trim, doors, or even a tired piece of furniture. A fresh coat of the right color in the right spot can shift the entire vibe of a space without the mess and commitment of a full wall redo.
If you want a pro-level look, surface prep is key. Clean thoroughly, sand lightly, and use painter’s tape like a minimalist uses words—just enough, exactly where it matters. Go with a quality primer if you’re covering a darker base or painting over wood. For furniture, go with a foam roller or spray for smoother coverage and fewer brushstrokes.
Color choice comes down to intention. Bold colors like deep graphite or emerald work well for accents that make a space pop—great for doors or a single chair. Softer tones—think sage, dusted pink, or warm ivory—lean toward calm, making them ideal when you’re after balance more than contrast. Match the tone to the room’s function, and let that guide your palette.
Small tweaks. Big shift. Keep it simple but thoughtful.
Time, Tools, and Payoff: What to Expect When You DIY in 2024
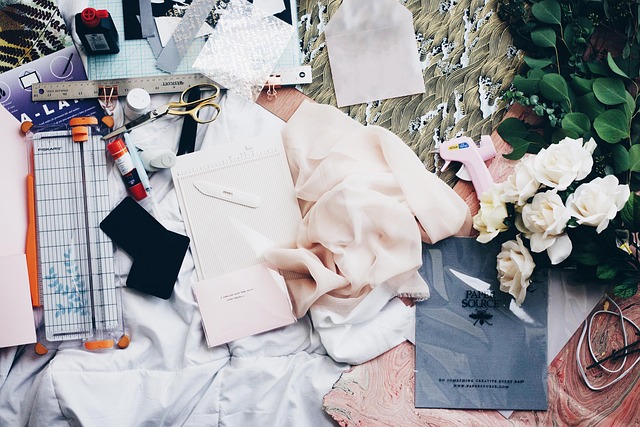
Before you dive into a project for your vlog, it helps to know what you’re getting into. Quick upgrades like lighting setups or desktop mic rigs can be knocked out in 2 to 4 hours. Editing bay overhauls or full room builds take a weekend or more. Difficulty runs from basic cable management (low) to custom shelving or LED grid rigs (moderate to high), depending on your comfort with tools.
Speaking of tools, if you’re doing vlogging-focused DIY more than once, a quality tripod, universal clamp mount, and a cordless drill are non-negotiables. Add in a decent softbox kit and a compact label printer if you’re aiming for a studio that’s clean and functional. They’ll pay off across projects, saving you time and frustration.
The key here is treating each weekend build as a long-term upgrade. Better framing, easier filming, smarter storage — these changes make you faster, more consistent, and less dependent on run-and-gun setups. Better content starts with a better workflow, and a few weekend projects get you there.
Start small. Change one thing and see how it feels. Maybe it’s swapping out those tired kitchen cabinet handles for something clean and minimal. Or adding peel-and-stick tiles to a dull entryway wall. These aren’t massive undertakings, but they work. They build confidence.
You don’t need to gut your entire space to make it feel new. Quick fixes like painting a single accent wall, installing LED strip lighting, or reworking a small nook into a functional workspace can shift the vibe of an entire room. Fast, affordable, and no contractor required.
It’s not about breaking the bank. It’s about momentum. Stack a few of these wins and suddenly the whole place starts to feel different. You’re not just updating your space—you’re building the habit of change.
 Rebecca McDanielords is the kind of writer who genuinely cannot publish something without checking it twice. Maybe three times. They came to diy home projects through years of hands-on work rather than theory, which means the things they writes about — DIY Home Projects, Gardening and Landscaping Ideas, Home Design Trends, among other areas — are things they has actually tested, questioned, and revised opinions on more than once.
That shows in the work. Rebecca's pieces tend to go a level deeper than most. Not in a way that becomes unreadable, but in a way that makes you realize you'd been missing something important. They has a habit of finding the detail that everybody else glosses over and making it the center of the story — which sounds simple, but takes a rare combination of curiosity and patience to pull off consistently. The writing never feels rushed. It feels like someone who sat with the subject long enough to actually understand it.
Outside of specific topics, what Rebecca cares about most is whether the reader walks away with something useful. Not impressed. Not entertained. Useful. That's a harder bar to clear than it sounds, and they clears it more often than not — which is why readers tend to remember Rebecca's articles long after they've forgotten the headline.
Rebecca McDanielords is the kind of writer who genuinely cannot publish something without checking it twice. Maybe three times. They came to diy home projects through years of hands-on work rather than theory, which means the things they writes about — DIY Home Projects, Gardening and Landscaping Ideas, Home Design Trends, among other areas — are things they has actually tested, questioned, and revised opinions on more than once.
That shows in the work. Rebecca's pieces tend to go a level deeper than most. Not in a way that becomes unreadable, but in a way that makes you realize you'd been missing something important. They has a habit of finding the detail that everybody else glosses over and making it the center of the story — which sounds simple, but takes a rare combination of curiosity and patience to pull off consistently. The writing never feels rushed. It feels like someone who sat with the subject long enough to actually understand it.
Outside of specific topics, what Rebecca cares about most is whether the reader walks away with something useful. Not impressed. Not entertained. Useful. That's a harder bar to clear than it sounds, and they clears it more often than not — which is why readers tend to remember Rebecca's articles long after they've forgotten the headline.